Crack detection & monitoring in spring manufacturing
Detect cracks, evaluate raw material, identify tool wear, and track machine trends – QASS makes it possible.
100% Inline Crack Detection
QASS enables real-time crack detection when coiling springs. We monitor every millisecond of the process and any defective components are automatically ejected from the system.
Maximum Process Stability
By analyzing individual process phases such as coiling, bending, and cutting, root causes of defects can be identified precisely. This increases process stability and ensures consistently high product quality.
Early Tool Wear Detection
QASS continuously monitors signal patterns and detects wear on cutting tools or coiling pins at an early stage. Maintenance can be planned proactively, helping to avoid unplanned downtime.
Raw Material Quality Assessment
In addition to process monitoring, QASS also enables conclusions to be drawn about the quality of the raw material used. Material-related risks and quality issues are detected at an early stage.
Crack detection in spring production
Seamless monitoring during spring production for maximum quality and safety
During the winding of springs, even the smallest cracks can occur, critically affecting component quality and reliability. Conventional inspection methods such as visual inspection or downstream testing quickly reach their limits, especially in high-volume production.
QASS enables continuous and automatic crack detection directly within the production process. Through real-time FFT analysis of structure-borne sound data, cracks are detected at the moment they occur, allowing defective parts to be automatically sorted out immediately.
Even the finest cracks from 25 µm can be detected, regardless of whether they are located on the surface or deep within the material. A joint research project by VDFI (Association of the German Down and Feather industry) and Wismar University confirms that QASS technology reliably detects even the smallest cracks during spring coiling in real time. This enables 100% inline crack inspection, reduces false rejects, and sustainably increases process reliability in your production.

More about the research project
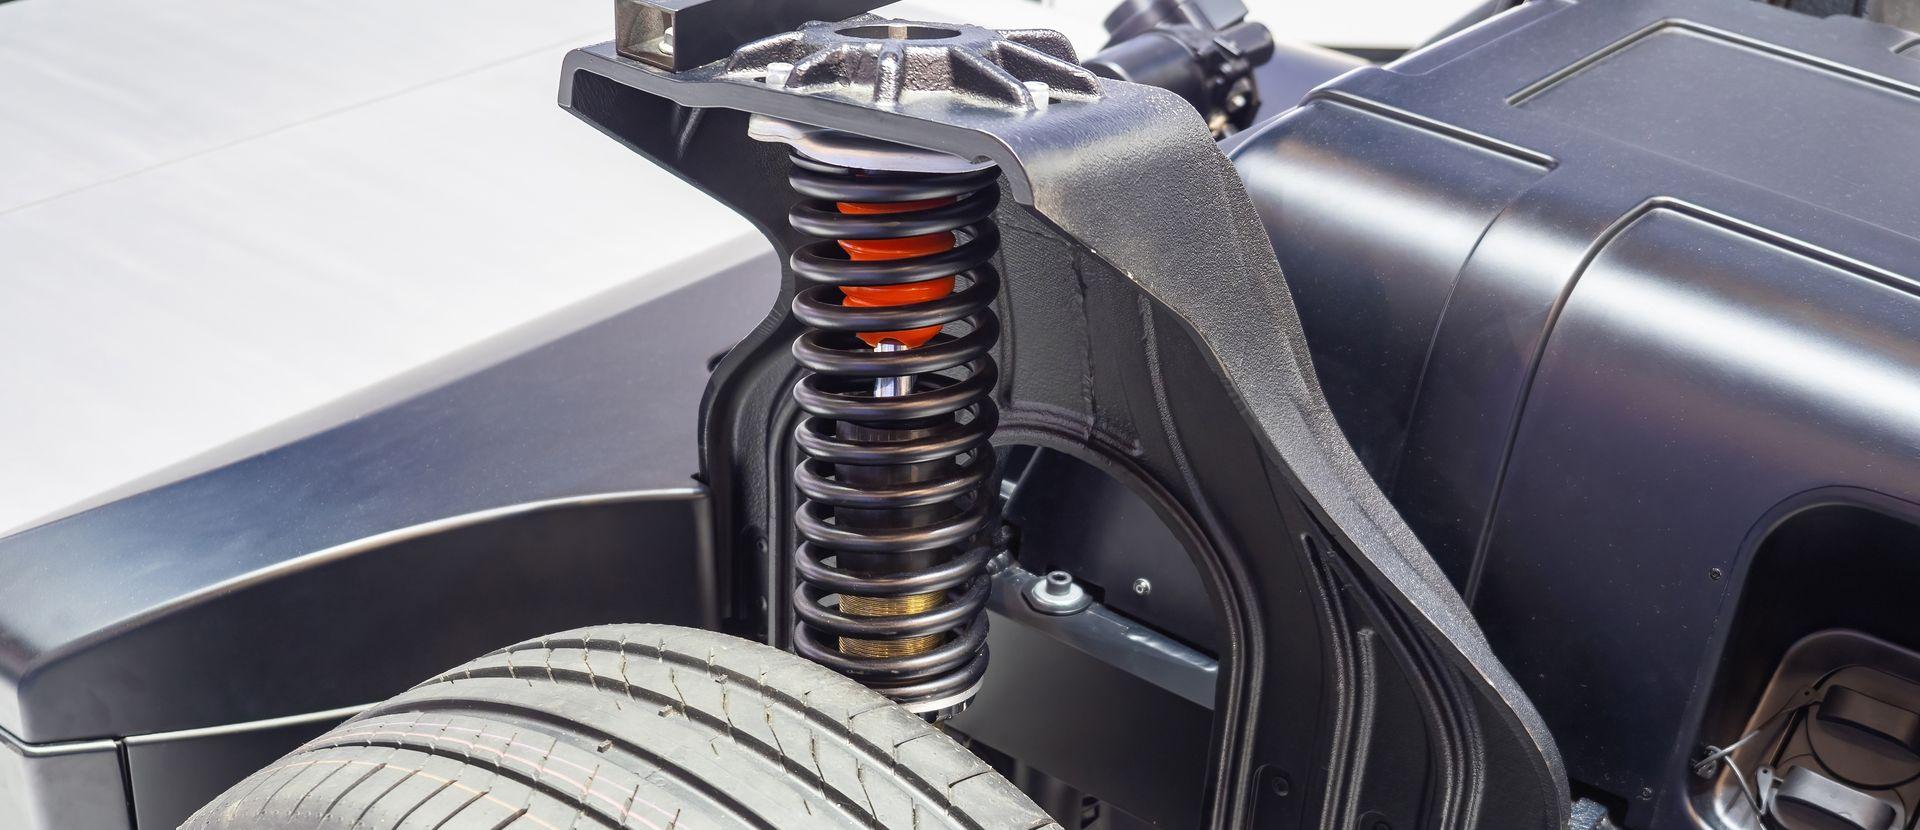 Figure 1: Detailed view of a vehicle spring.
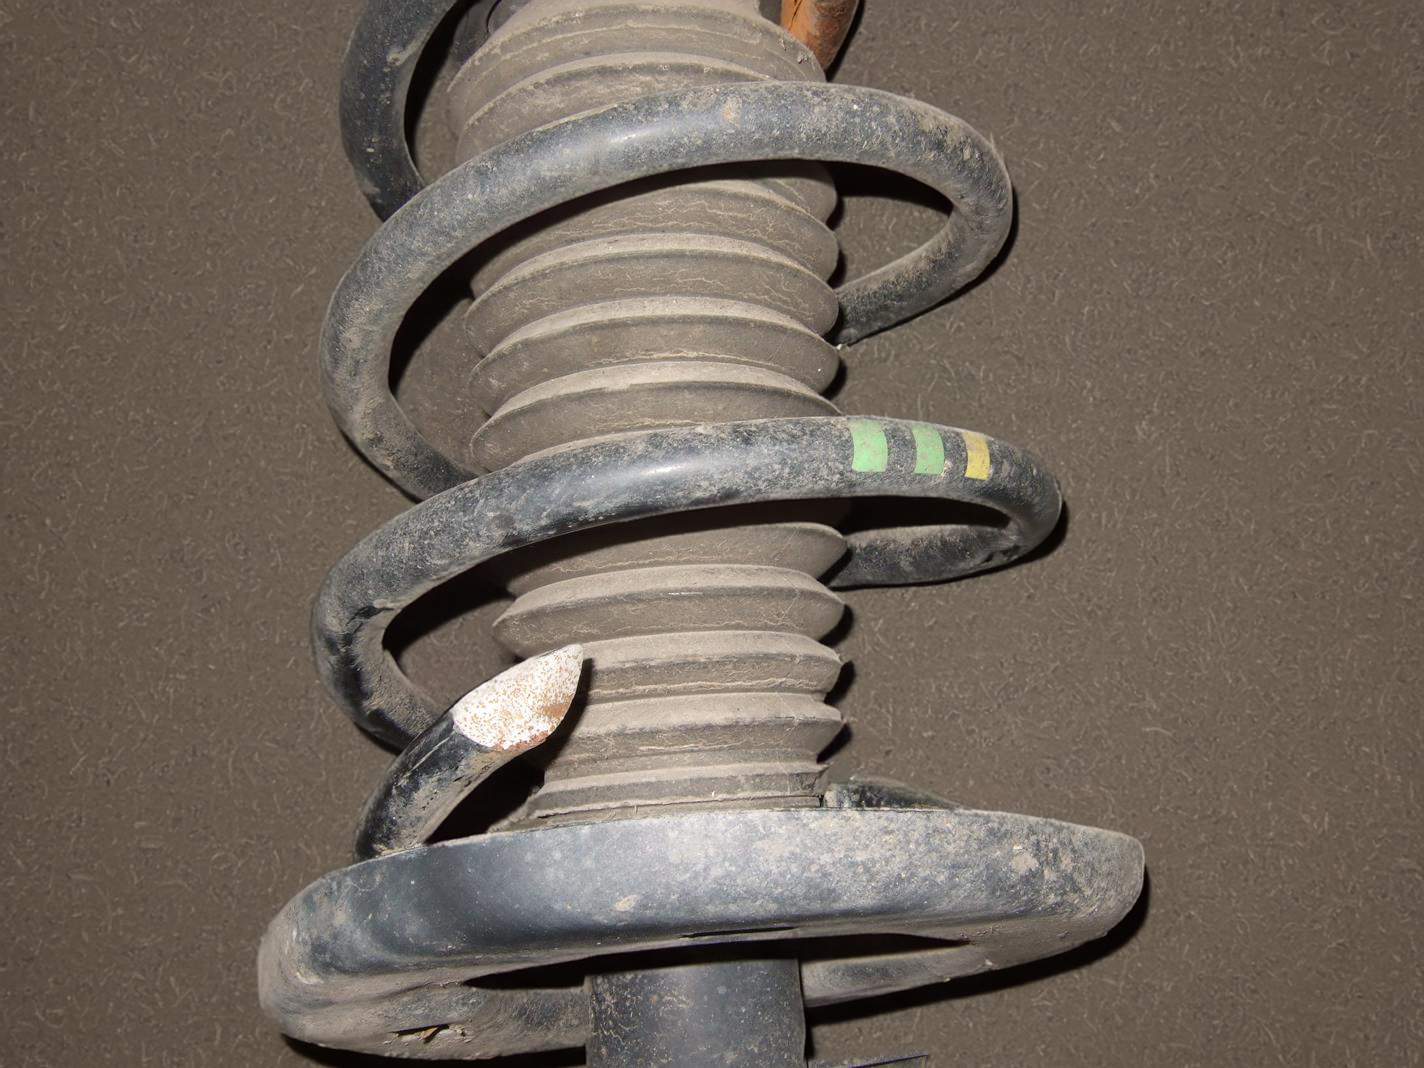
Figure 2: Close-up of a cracked vehicle spring.
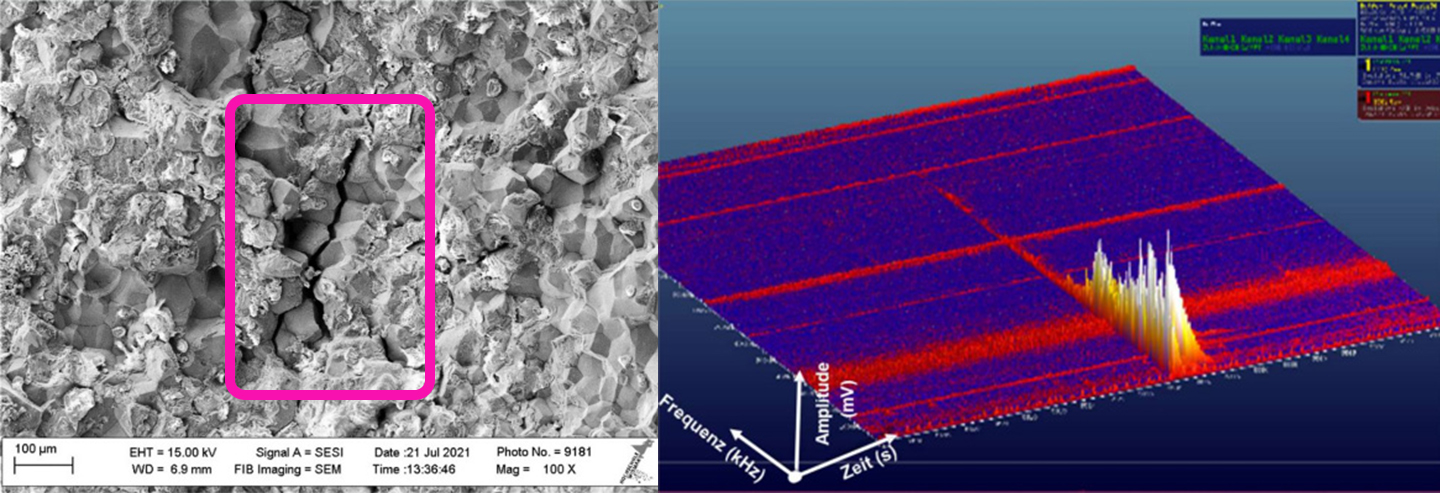
Figure 3: SEM image of a crack (left) and the corresponding crack signal from the QASS FFT analysis (right).
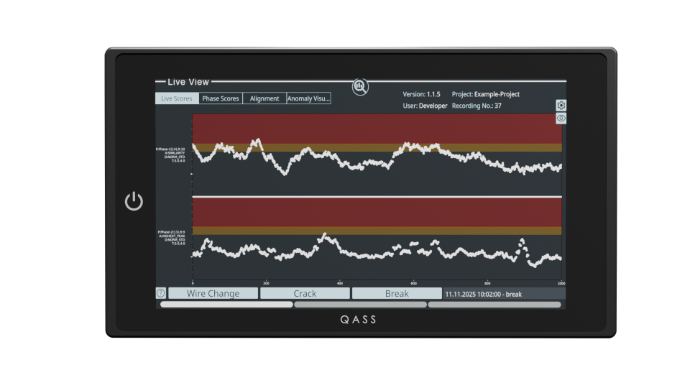
Process and tool monitoring in spring coiling
QASS technology enables continuous monitoring of the entire spring coiling process and provides detailed analysis of all process phases.
Tool wear leads to changes in signal patterns, which are automatically detected and analyzed by QASS technology. By dividing the process into individual stages such as coiling, bending, and cutting, specific issues such as dull cutting tools, damaged coiling pins, or process trends can be identified precisely.
At the same time, QASS also enables assessment of the quality of the raw material used.
Your branches
Automotive
Aerospace
Wind energy
Medical technology
Mechanical engineering
How it works
The QASS Optimizer4D in use.
Install QASS sensor
The structure-borne sound sensors are installed on the coiling or setting machine. When winding wire, friction and forming forces occur within the machine, which generates noise.
Although these noises are not perceptible to the human ear above a frequency of 20 kHz, they are transmitted within the machine and can be detected by QASS sensors.
Even the smallest differences from the standard produce deviations in the overall emission pattern during the forming process. A simple screw connection to the machine is important so that the vibrations and emissions of the process are transmitted through the material to the sensors.
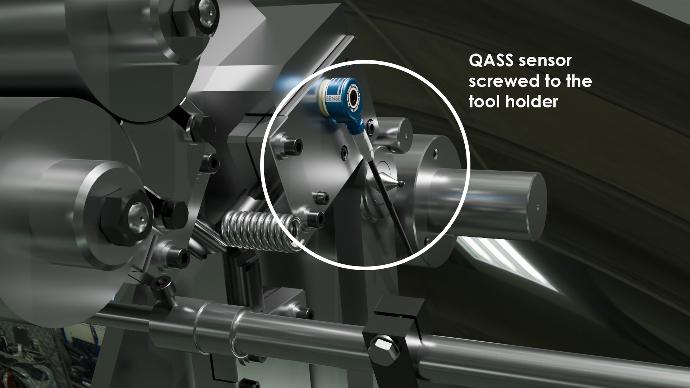 QASS sensor screwed to the tool holder.
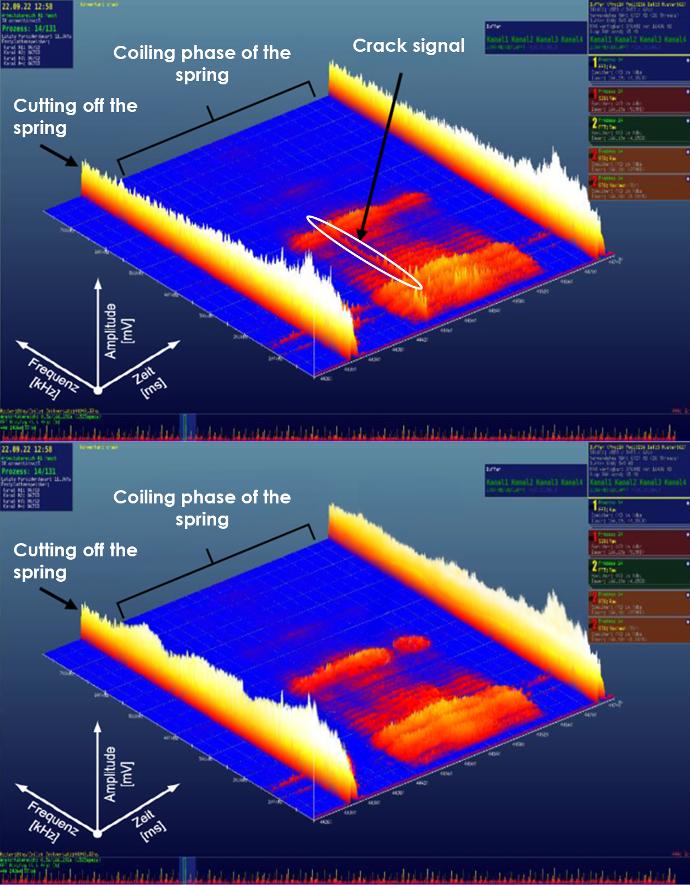 Structure-borne sound image of a coiling process of a spring in the QASS Optimizer4D measuring system. (With and without crack)
Whenever a crack occurs in solid material due to forming forces pressure waves run through the component. The stronger the structure, the greater the intensity of this wave. It is important to distinguish these emissions from normal machine noise.
The "Optimizer4D", our high-performance measuring system that can record and evaluate structure-borne sound data in real time, is used for this purpose. This makes it possible to detect the occurrence of cracks and sort out the damaged component.
The QASS spectral analysis makes it possible to separate all working and interference noises from the machine so that even micro-cracks can be reliably detected as they occur.
The recorded structure-borne sound signals can be displayed and tracked in our FFT landscape, as shown in the image (left). Our essential features such as clustering and the associated pattern recognition, as well as corresponding frequency filters and masks, enable us to precisely separate important signals from interference or machine noise and analyze them within milliseconds.
The Optimizer4D can be used for more than just detecting cracks. Structure-borne sound data are fingerprints of manufacturing processes and machines. If elements of the tools, such as wind pins or guide rollers, wear out, this can be recognized in the structure-borne sound data. Defective primary material emits different signals than good quality primary material. QASS provides its customers with deeper insights into their processes, indicates at an early stage when machines require maintenance and provides its customers with important information about the primary material supplied by the wire manufacturer.
Users of QASS measurement sensors benefit from
- Reliable crack and micro-crack detection
Cracks that reach critical size can be detected and ejected by Optimizer4D. A warning is automatically forwarded to the system.
- Monitoring of the tool condition (Tool monitoring)
Our measurement system not only enables the detection of cracks, but can also detect damage to the machine tools (e.g. wear on the wind pins) - Quality assessment of the primary material
Based on characteristic differences in the structure-borne sound data, we can draw conclusions about cracks in the primary material.
Detecting cracks, evaluating primary material, detecting wear on the coiling tool, tracking machine trends - the Optimizer4D makes all this possible.
Request
You contact us by phone or e-mail and tell us about your situation
Target definition
We define the goals of the project together with you.
Data analysis
The QASS measurement technology is installed and records data, which is then analyzed.
Application
The measurement technology is specially adapted to your purposes.
Evaluation
Our system is tested and optimized at your premises under production conditions.
Arrange a consultation now!
Ask our experts about the possibilities for your industrial processes without obligation.